Viewing entries in
dessert

spiced apple cake with caramel

2 Comments

spiced apple cake with caramel

Apple cake just might be my very definition of fall. When the apples ripen and the summer days start to cool enough that I'm overly excited about my oven all over again, it's this apple cake that I always want first. It is sweet and decadent, but also full of fruit - so I'll go ahead and say it makes a great breakfast (though it definitely won't keep you full all morning). So if you're a fan of pie for breakfast, this may just be your new go to for the fall! 

This apple cake mixes a hearty (half) whole wheat cake spiced with ginger and nutmeg with a hefty serving of apples to create a perfect fall cake.

First we gently stir the wet ingredients into the dry ingredients, carefully folding them together with a rubber spatula to create a thick batter. 

Half of the batter goes into the bottom of our pan, then a thin layer of apples are placed in the middle of the cake to bring some apple richness throughout the entire cake. 

Next comes the rest of the batter and that hefty serving of apples, then your ready for the oven. Putting this many apples on our cake will keep the cake super moist (maybe event too wet in some folks minds... but I sure love a moist cake!). If you want a less moist but still absolutely amazing cake, use a bundt pan! 

Then we just need to bake it, for quite a long time, until the center is fully cooked. And voila - cake! 

I know I'm using a glass dish that differs from the suggested 8x8 size in these photos. I highly recommend you use a metal 8x8 baking dish. The cake will cook more evenly, and not have as thick of a bake line as mine did (the darker edge where the cake is touching the pan). 

But whatever you do use, the cake will be delicious, and you will rejoice!

Last but not (by a long shot) least, I couldn't help but top this apple cake with a drizzle of the easiest caramel you've ever laid your hands on. Don't get me wrong, I absolutely love the slow gentle process of caramelizing a hefty serving of cane sugar to create a luscious caramel... but I also understand that not everyone feels so comfortable melting sugar. If you're feeling adventurous or love making caramel, my recipe can be found buried in this lengthy recipe for brownie ice cream sandwiches (yes, I put a layer of caramel in them... because obviously brownies and ice cream wasn't enough decadence).  

This caramel I'm sharing here, on the other hand, requires basically no work and no worry. If you're having a lazy day, but also really want a helping of caramel sauce for your cake, your ice cream, or your spoon - this is it my friends. You're welcome. 

The cake recipe was adapted from the wonderful Smitten Kitchen

Apple Cake 

ingredients: 

2 large apples, cut to a small dice 

2 cups + 2 Tbsp cane sugar 

1 Tbsp cinnamon 

1 Tbsp vanilla 

1 cup vegetable oil 

4 eggs 

2 Tbsp lemon juice 

1 1/2 cups white flour 

1 1/4 cups whole wheat pastry flour 

1 Tbsp baking powder 

1 tsp salt 

1 tsp ground ginger

1/4 tsp freshly ground nutmeg

instructions: 

  • Prepare an 8x8 square baking dish by buttering and flouring it. 
  • In a small bowl, stir together apples, cinnamon, and 2 Tbsp sugar. Set aside. 
  • In a large liquid measuring cup or medium bowl, combine the wet ingredients. Start by whisking together eggs, oil, lemon juice, and vanilla. Once combined, add in the remaining 2 cups of sugar and whisk to combine. 
  • Stir together dry ingredients in a large bowl until evenly combined. Pour the wet ingredients into the dry and gently stir with a rubber spatula or wooden spoon until all the flour clumps have been incorporated. 
  • Pour about half the batter into the bottom of the pan, then sprinkle a very sparse layer of apples over the batter. Spread the remaining batter over the thin layer of apples, then cover the top with the remaining apples. 
  • Bake at 350 for about about 75 minutes, or until the center is cooked. 
  • Drizzle entire cake with the caramel, or each slice as you're serving. 

Super Simple Caramel Drizzle 

ingredients:

1 cup brown sugar

4 Tbsp unsalted butter

1/2 cup heavy cream

pinch of salt  

instructions: 

  • Combine all ingredients in a small saucepan over medium heat and whisk to combine as the butter melts. 
  • Continue stirring and cooking until the mixture starts to boil lightly. Let it boil for a few minutes, stirring constantly. 
  • Remove from heat, pour into a glass container, and let cool completely before using. 


2 Comments

sungold tomato ice cream

2 Comments

sungold tomato ice cream

Holy tomatoes, batman! The tomatoes are piling high in the Portland markets, with endless varieties to choose from. So... one might go so far as to say that this is toot sweet's official tomato week. On Saturday, my monthly Awesome Mitten post went live, featuring none other than tomatoes! Three simple recipes for easy tomato-centric dishes, and a bonus recipe for basil oil... because, well, you can't have tomatoes without basil! 

After all those savory tomato dishes, I couldn't help but work some of these beauties into a little something sweet. Hence, the ice cream! 

Now, I feel I have to admit a little something about myself here. I don't actually like tomatoes that much... there. I said it! I used to really dislike them, but as I'm growing up a bit I'm learning to like them much more than I ever did before. Heck, I've even been eating them raw on the occasion (as long as they're paired with some cheese, of course)! 

Thankfully, tomatoes are just so awesomely beautiful, I'm always tempted to buy them and find something tasty to do with them. Year by year, I'll become more of a tomato fan! 

Of course ice cream surely isn't the first place you expect to see tomatoes, but they are a fruit ya know! Sweet and flavorful sungold cherry tomatoes cook down into a simple jam to swirl through a vanilla ice cream base studded with fresh tarragon. It might sound a little crazy, but I promise you - there's nothing but amazing flavors here! 

sungold tomato jam: 

This simple jam is going to be swirled throughout the ice cream to give it it's tomatoey flavor. I've included some optional spices in the ingredient list - they balance nicely with the tarragon and give the ice cream a really complex flavor. That said, they will mask a bit of the tomato flavor, so if you really want to focus on tomatoes - leave the spices out. 

ingredients: 

1 pound sungold tomatoes 

3 Tbsp lemon juice 

2 tsp apple cider vinegar 

1/4 cup brown sugar 

1/3 cup cane sugar 

1/2 tsp cinnamon (optional) 

1/2 tsp nutmeg (optional) 

instructions: 

  • Puree tomatoes in a blender until mostly smooth, then pour into a pot. Add all remaining ingredients, and simmer over medium heat for about an hour, until the jam thickens. The jam should easily mound on the back of a spoon when it's ready.
  • Once the jam is fully cooked, puree again with an immersion blender (or put it back into a regular blender), until nice and smooth! 

ice cream base: 

ingredients: 

6 egg yolks 

2 cups heavy cream 

2 cups whole milk 

3/4 cup cane sugar 

1/2 tsp ground vanilla, 1/2 a vanilla bean (scraped) or 1 tsp vanilla extract 

1/4 cup fresh tarragon, chopped finely 

instructions: 

  •  Using a stand mixer with the whisk attachment, a hand mixer, or a really super strong arm - whisk together the egg yolks and 1/2 cup of the sugar until it doubles in size, lightens to a pale yellow, and gains a silky ribbony texture. This should take a few minutes. 

  • Heat the cream, milk, remaining 1/4 cup sugar, and ground or bean vanilla (wait until later in the process if you're using the extract) to a scald, which is before a simmer but nice and steamy. 

  • With the mixer running, slowly pour the cream mixture into the yolks until fully combined to temper your eggs. Then pour the mixture back into the pot and heat over medium heat until your custard has formed (if you don't feel comfortable knowing when that is, use a thermometer and look for 180 degrees). While it's heating, use a silicone spatula to gently scrape the bottom of the pan and stir slowly. 

  • When you've reached 180 degrees, strain the custard through a fine mesh sieve into a medium bowl, and set that bowl into a larger one with a bit of ice and water in it to create a cooling water bath. Spin the inner bowl with one hand, while holding your spatula in the custard like a rudder to help the mixture cool evenly. 

  • Chill custard fully in the refrigerator before churning, at least a few hours. Add the tarragon when the ice cream is just about finished churning, letting it churn for long enough to mix it in evenly. 

churning and swirling: 

Once you're jam and ice cream base are made and chilled, you're just a few quick steps from ice cream heaven! Work through this as fast as you possibly can, to protect your precious ice cream! 

  • Put the container you're planning to freeze the ice cream in into the freezer, to prevent melting while your swirl. A wide dish works best, I use a rectangular pyrex container with a lid.
  • Churn the ice cream per you machine's instructions, until it's nice and thick. With the ice cream churned, you're going to layer and swirl the ice cream and jam into a container and let it freeze. This is the best way to get a nice swirl into your scoops! 
  • Layer about one third of the ice cream into the bottom of your dish. Spoon a few thick lines of jam across the layer of ice cream. 
  • Layer on the next third of your ice cream, and create those lines of jam again. 
  • Finally, layer on the rest of your ice cream, and another few lines of jam. Using a chop stick or skewer and give the ice cream and little swirl to make sure every scoop will have a good bit of jam in it! 

2 Comments

mini lemon blueberry cakes!

Comment

mini lemon blueberry cakes!

Sometimes, I just really get a hankering to make a cake. While generally reserved for special occasions only, I've had cake on my mind for the past few months and have been wanting to test some recipes. Why have I had it on my mind? Well, because I'm getting married next year and I have my mind set on making my own cake. Many people have told me I'm crazy, but I'm feeling really confident about it!  So, let this year be the year of practice cakes! 

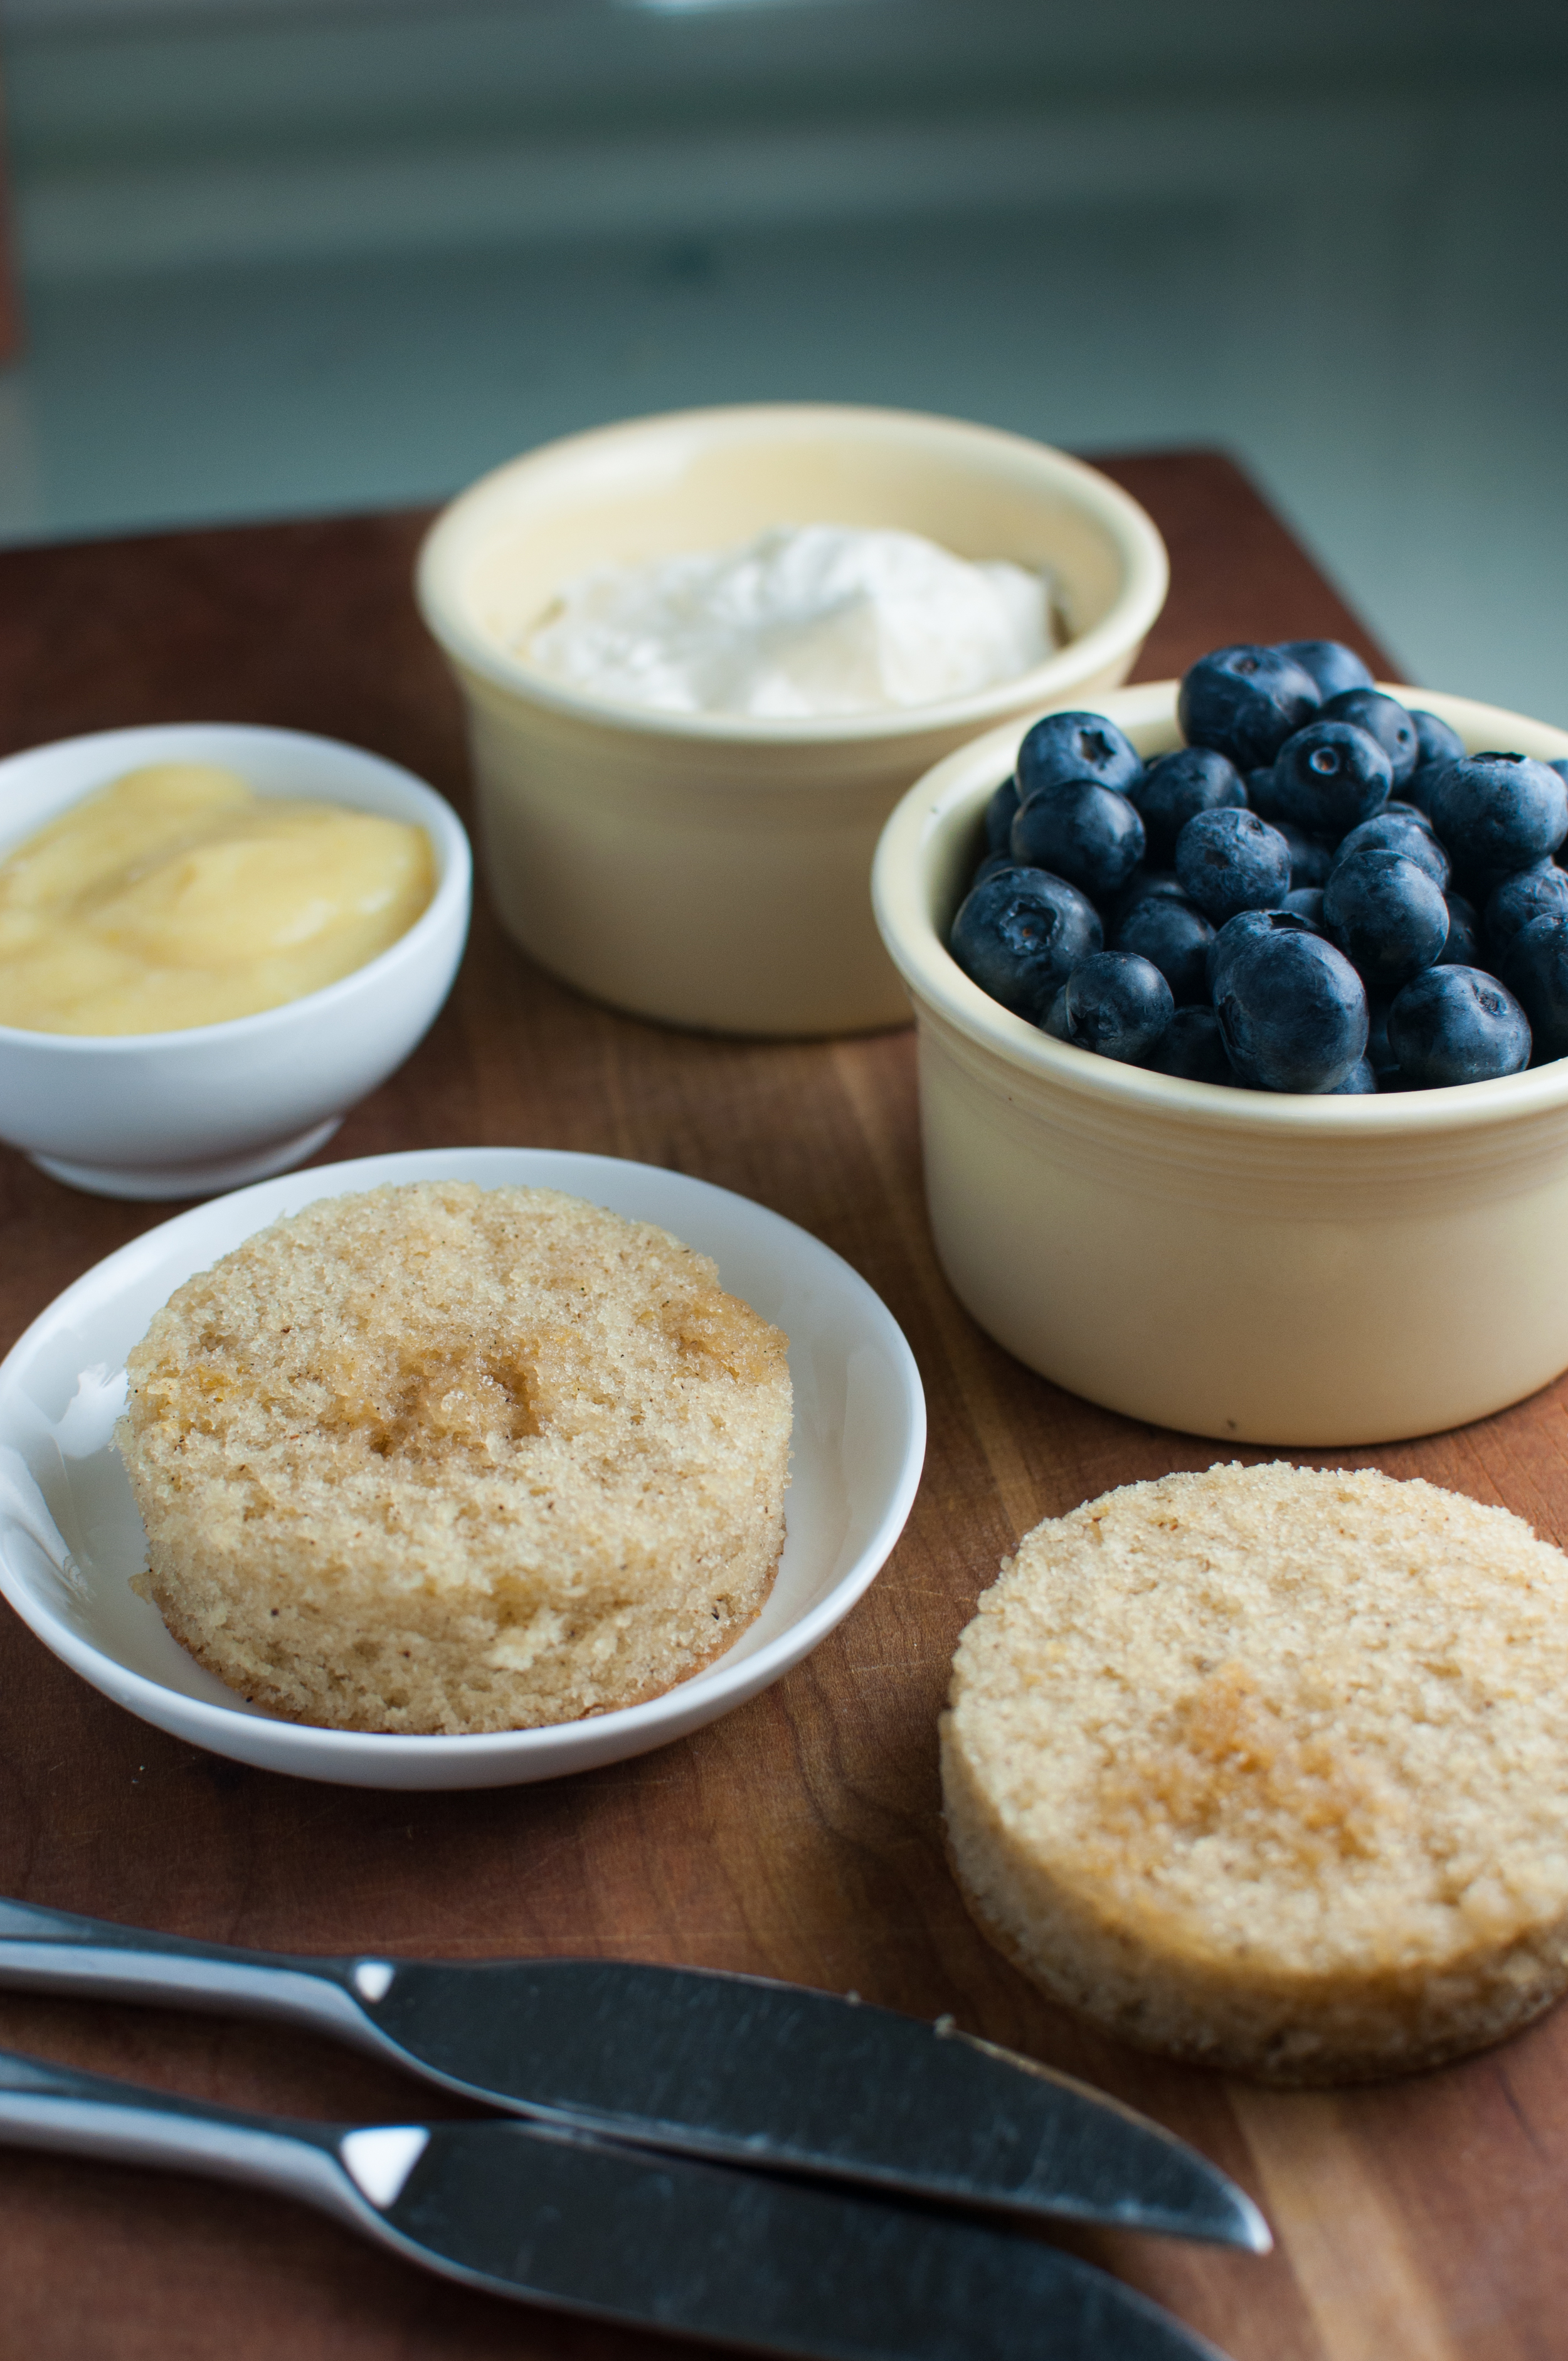
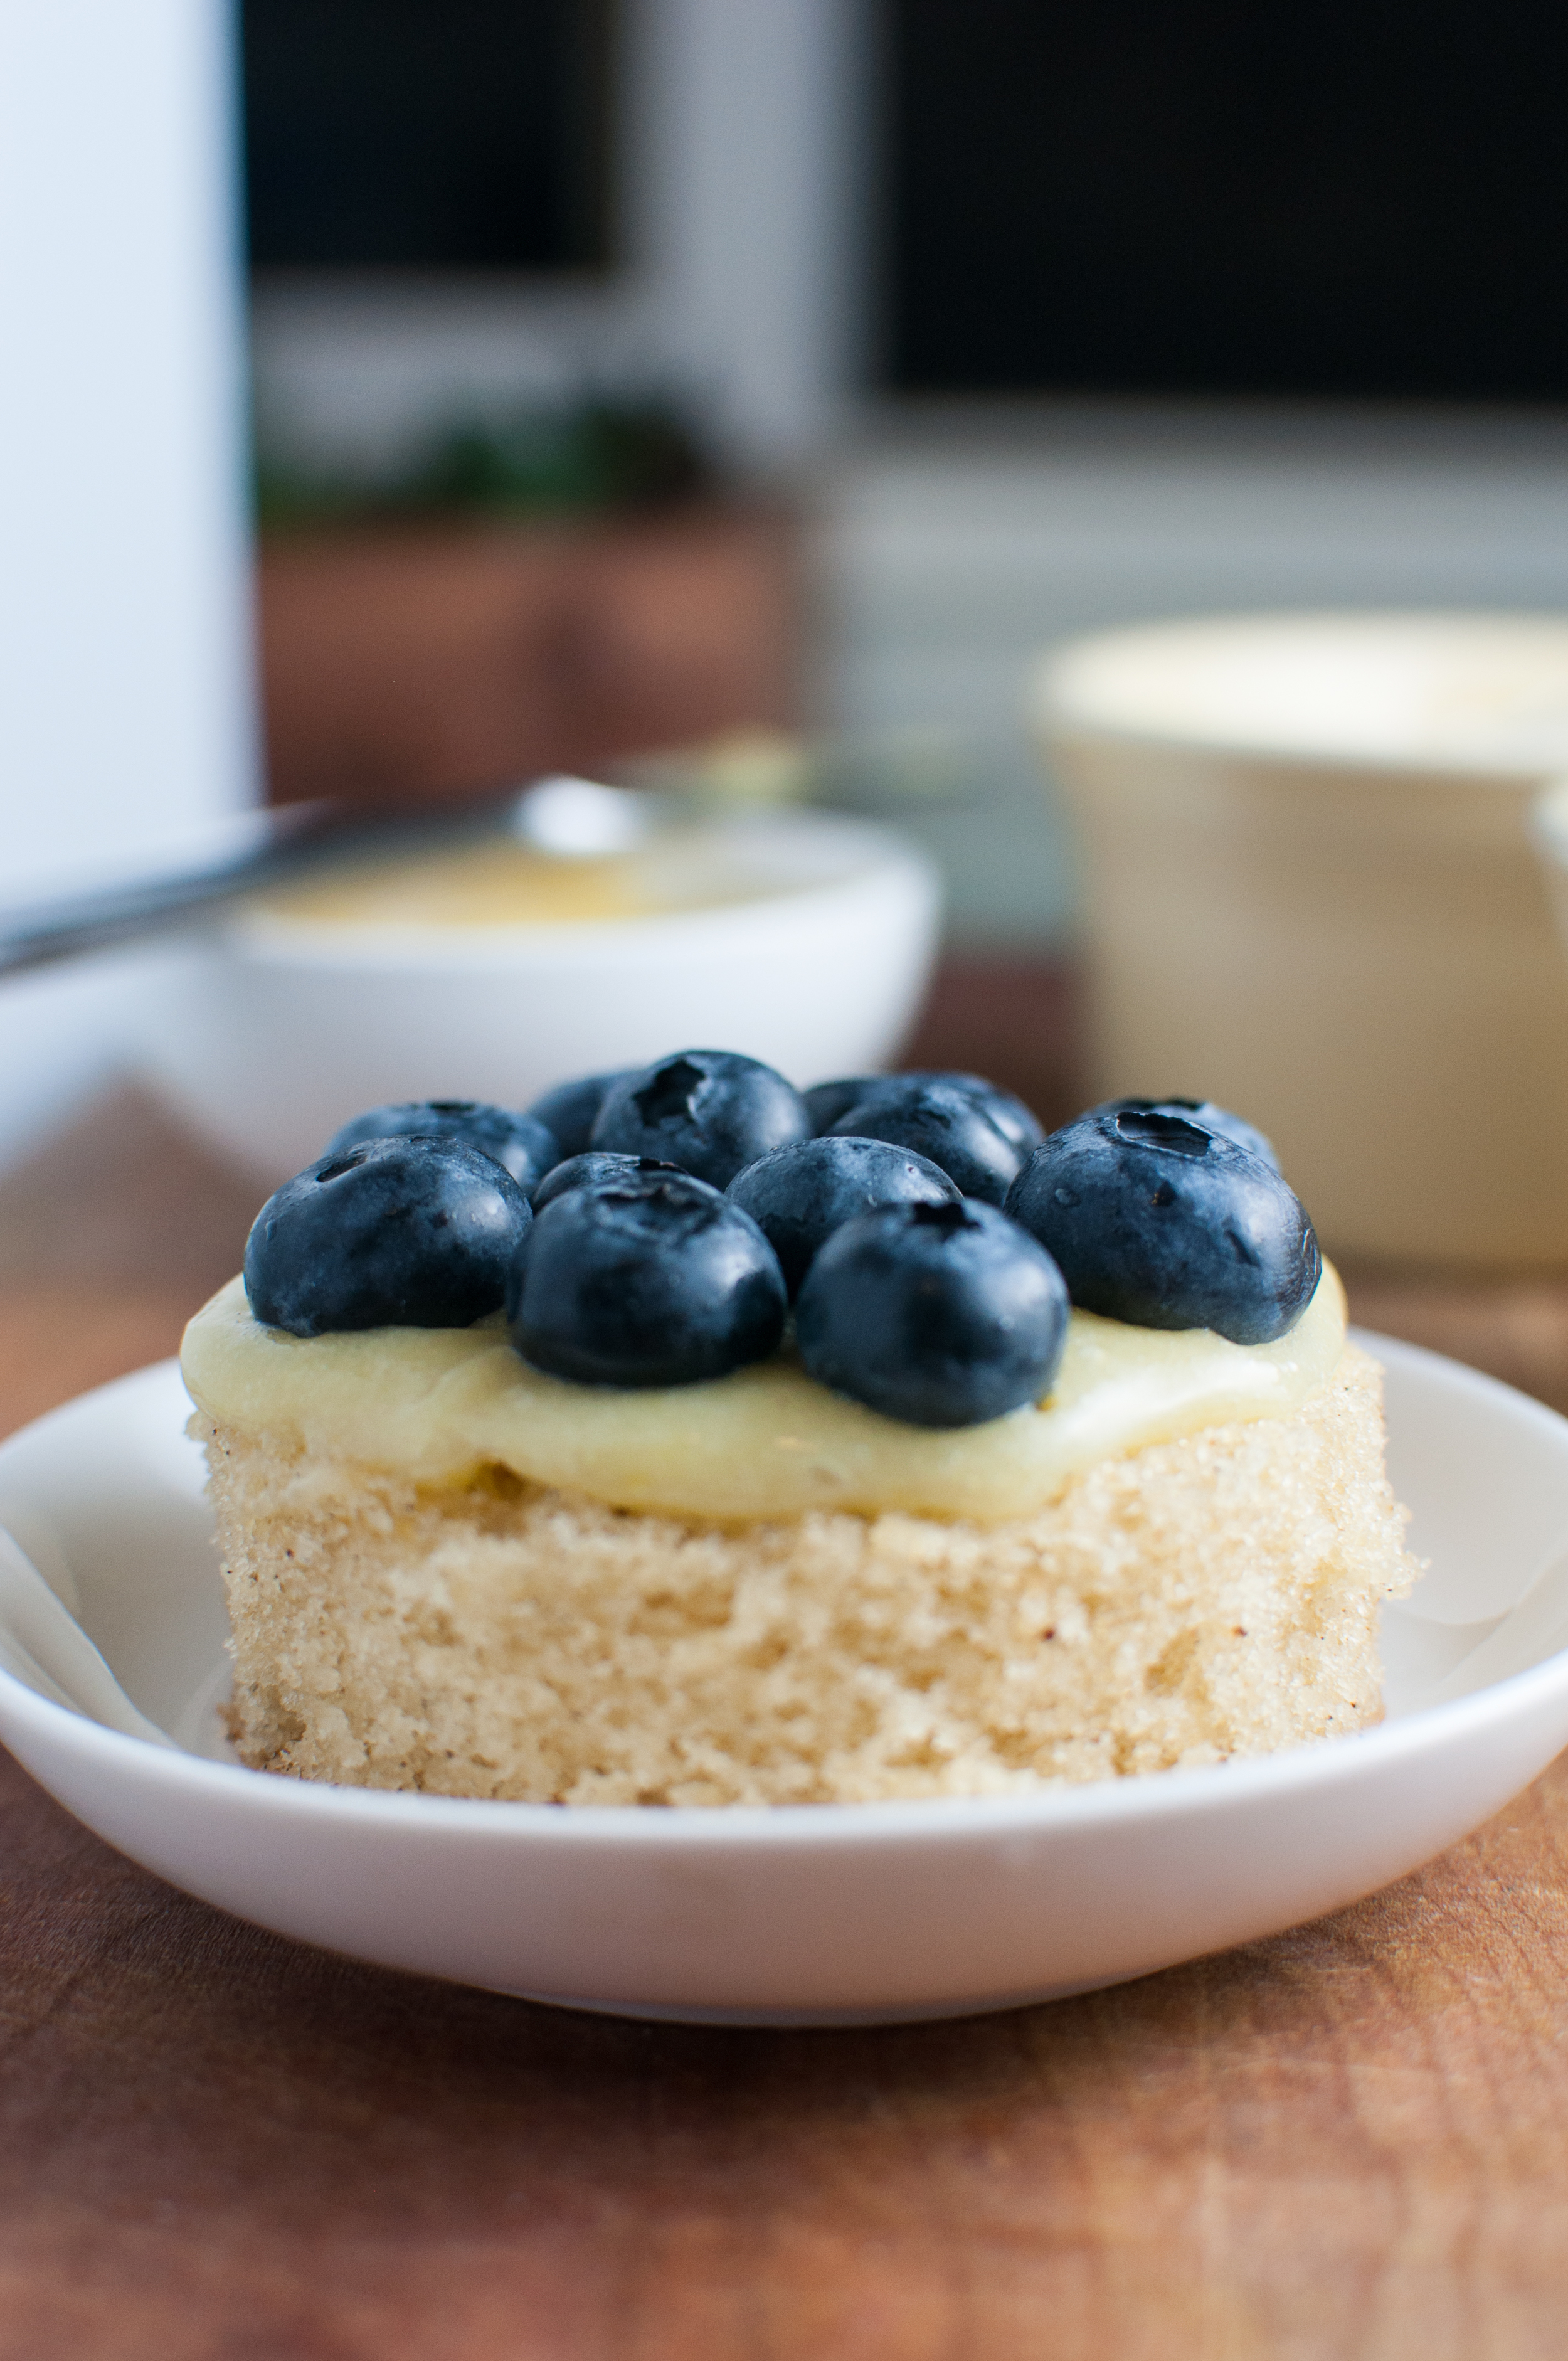
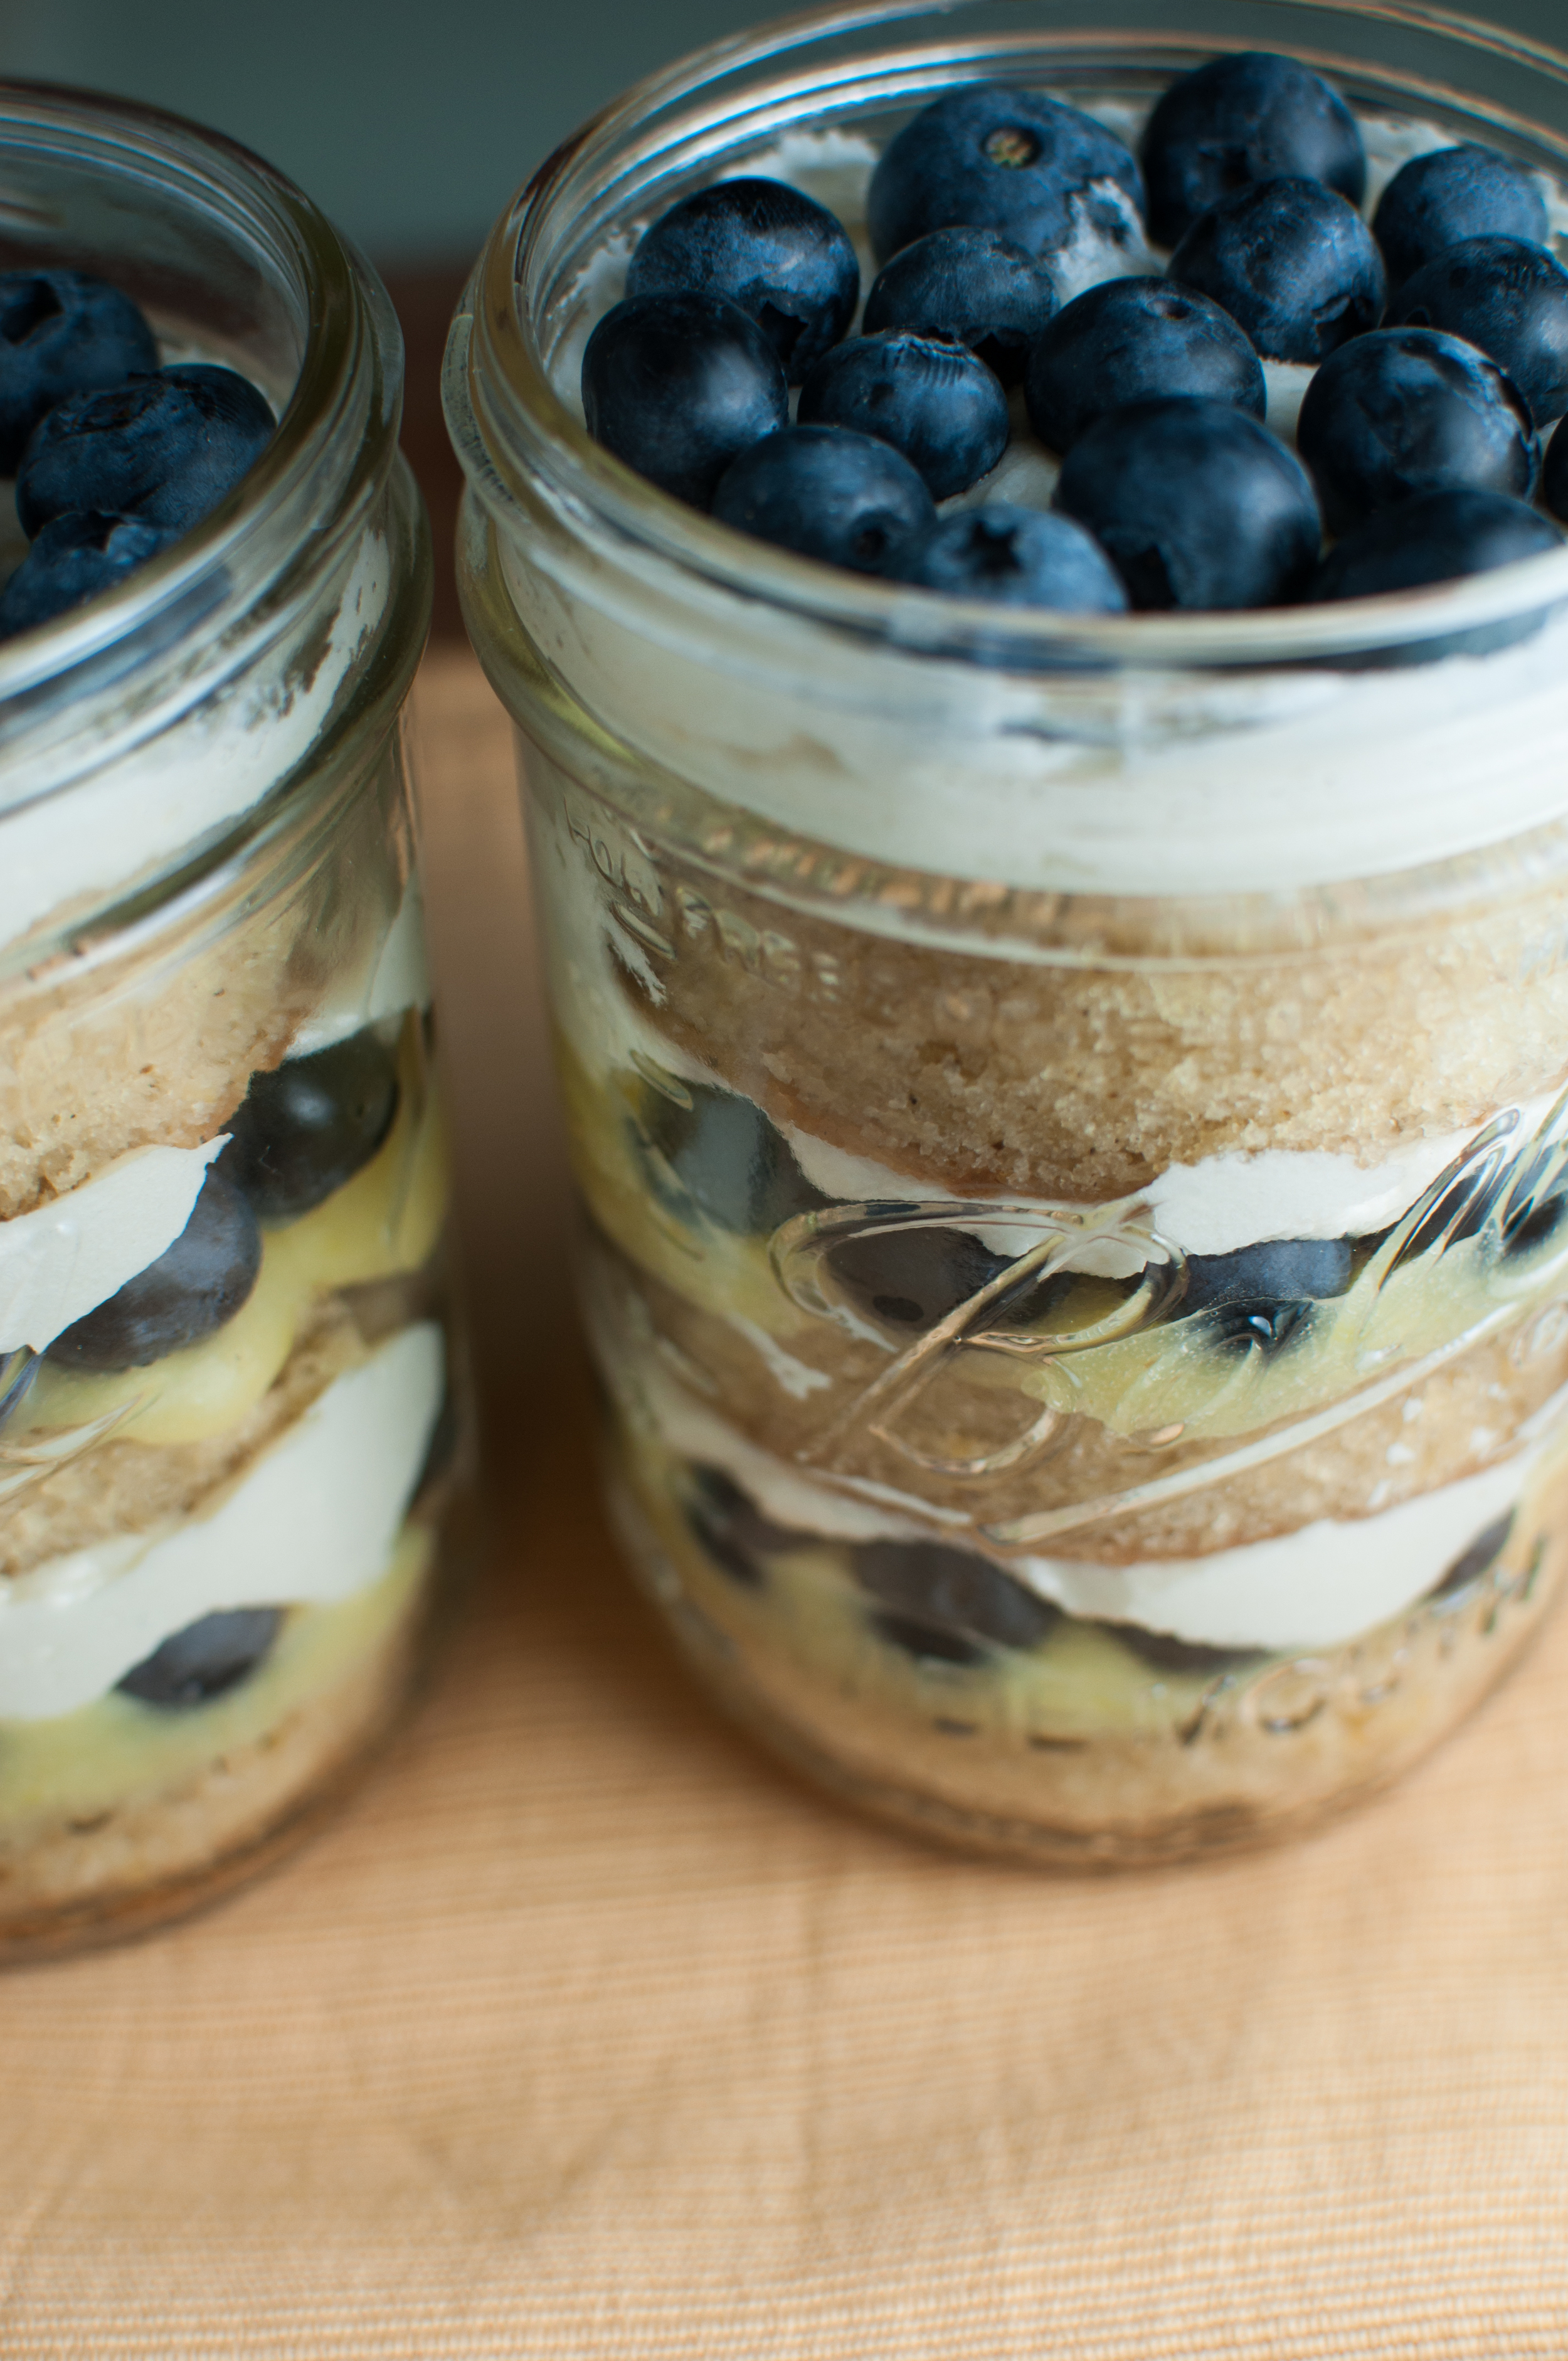
In making this cake, I wanted to test out Milk Bar's system of baking quarter sheet pan cakes and cutting circles to create the layers. I used a biscuit cutter to make myself some teeny tiny little cake laters, and it worked perfectly! The little layers made an awesome mini-cake, and stacked perfectly in ball jars for a different look. 

Of course lemon and blueberry comes together like a dream, as it always does. I decided to stud every piece of the cake with lemon, then layer in and decorate with simple fresh blueberries! So there is lemon zest in the cake, lemon curd to fill the layers, and a simple lemon buttercream to cover the cake. How could you go wrong? 

When my babes got home, I was really excited to show him the tiny cake because well, it's adorable!

He insisted we should take a photo for scale, to make sure folks understood the mini size... and immediately offered himself up as the subject! You'd be amazing at how many photos I have of food that include his mouth wide open : ) 

This guy! 

I wasn't making this for any occasion other than, well, cake! After making one tiny cake, I wanted to put together the rest of the ingredients in a way that they could easily be put in the freezer for a treat next time I was craving cake (but lets be real... I ate multiple of these within a few days. cake is so delicious)!

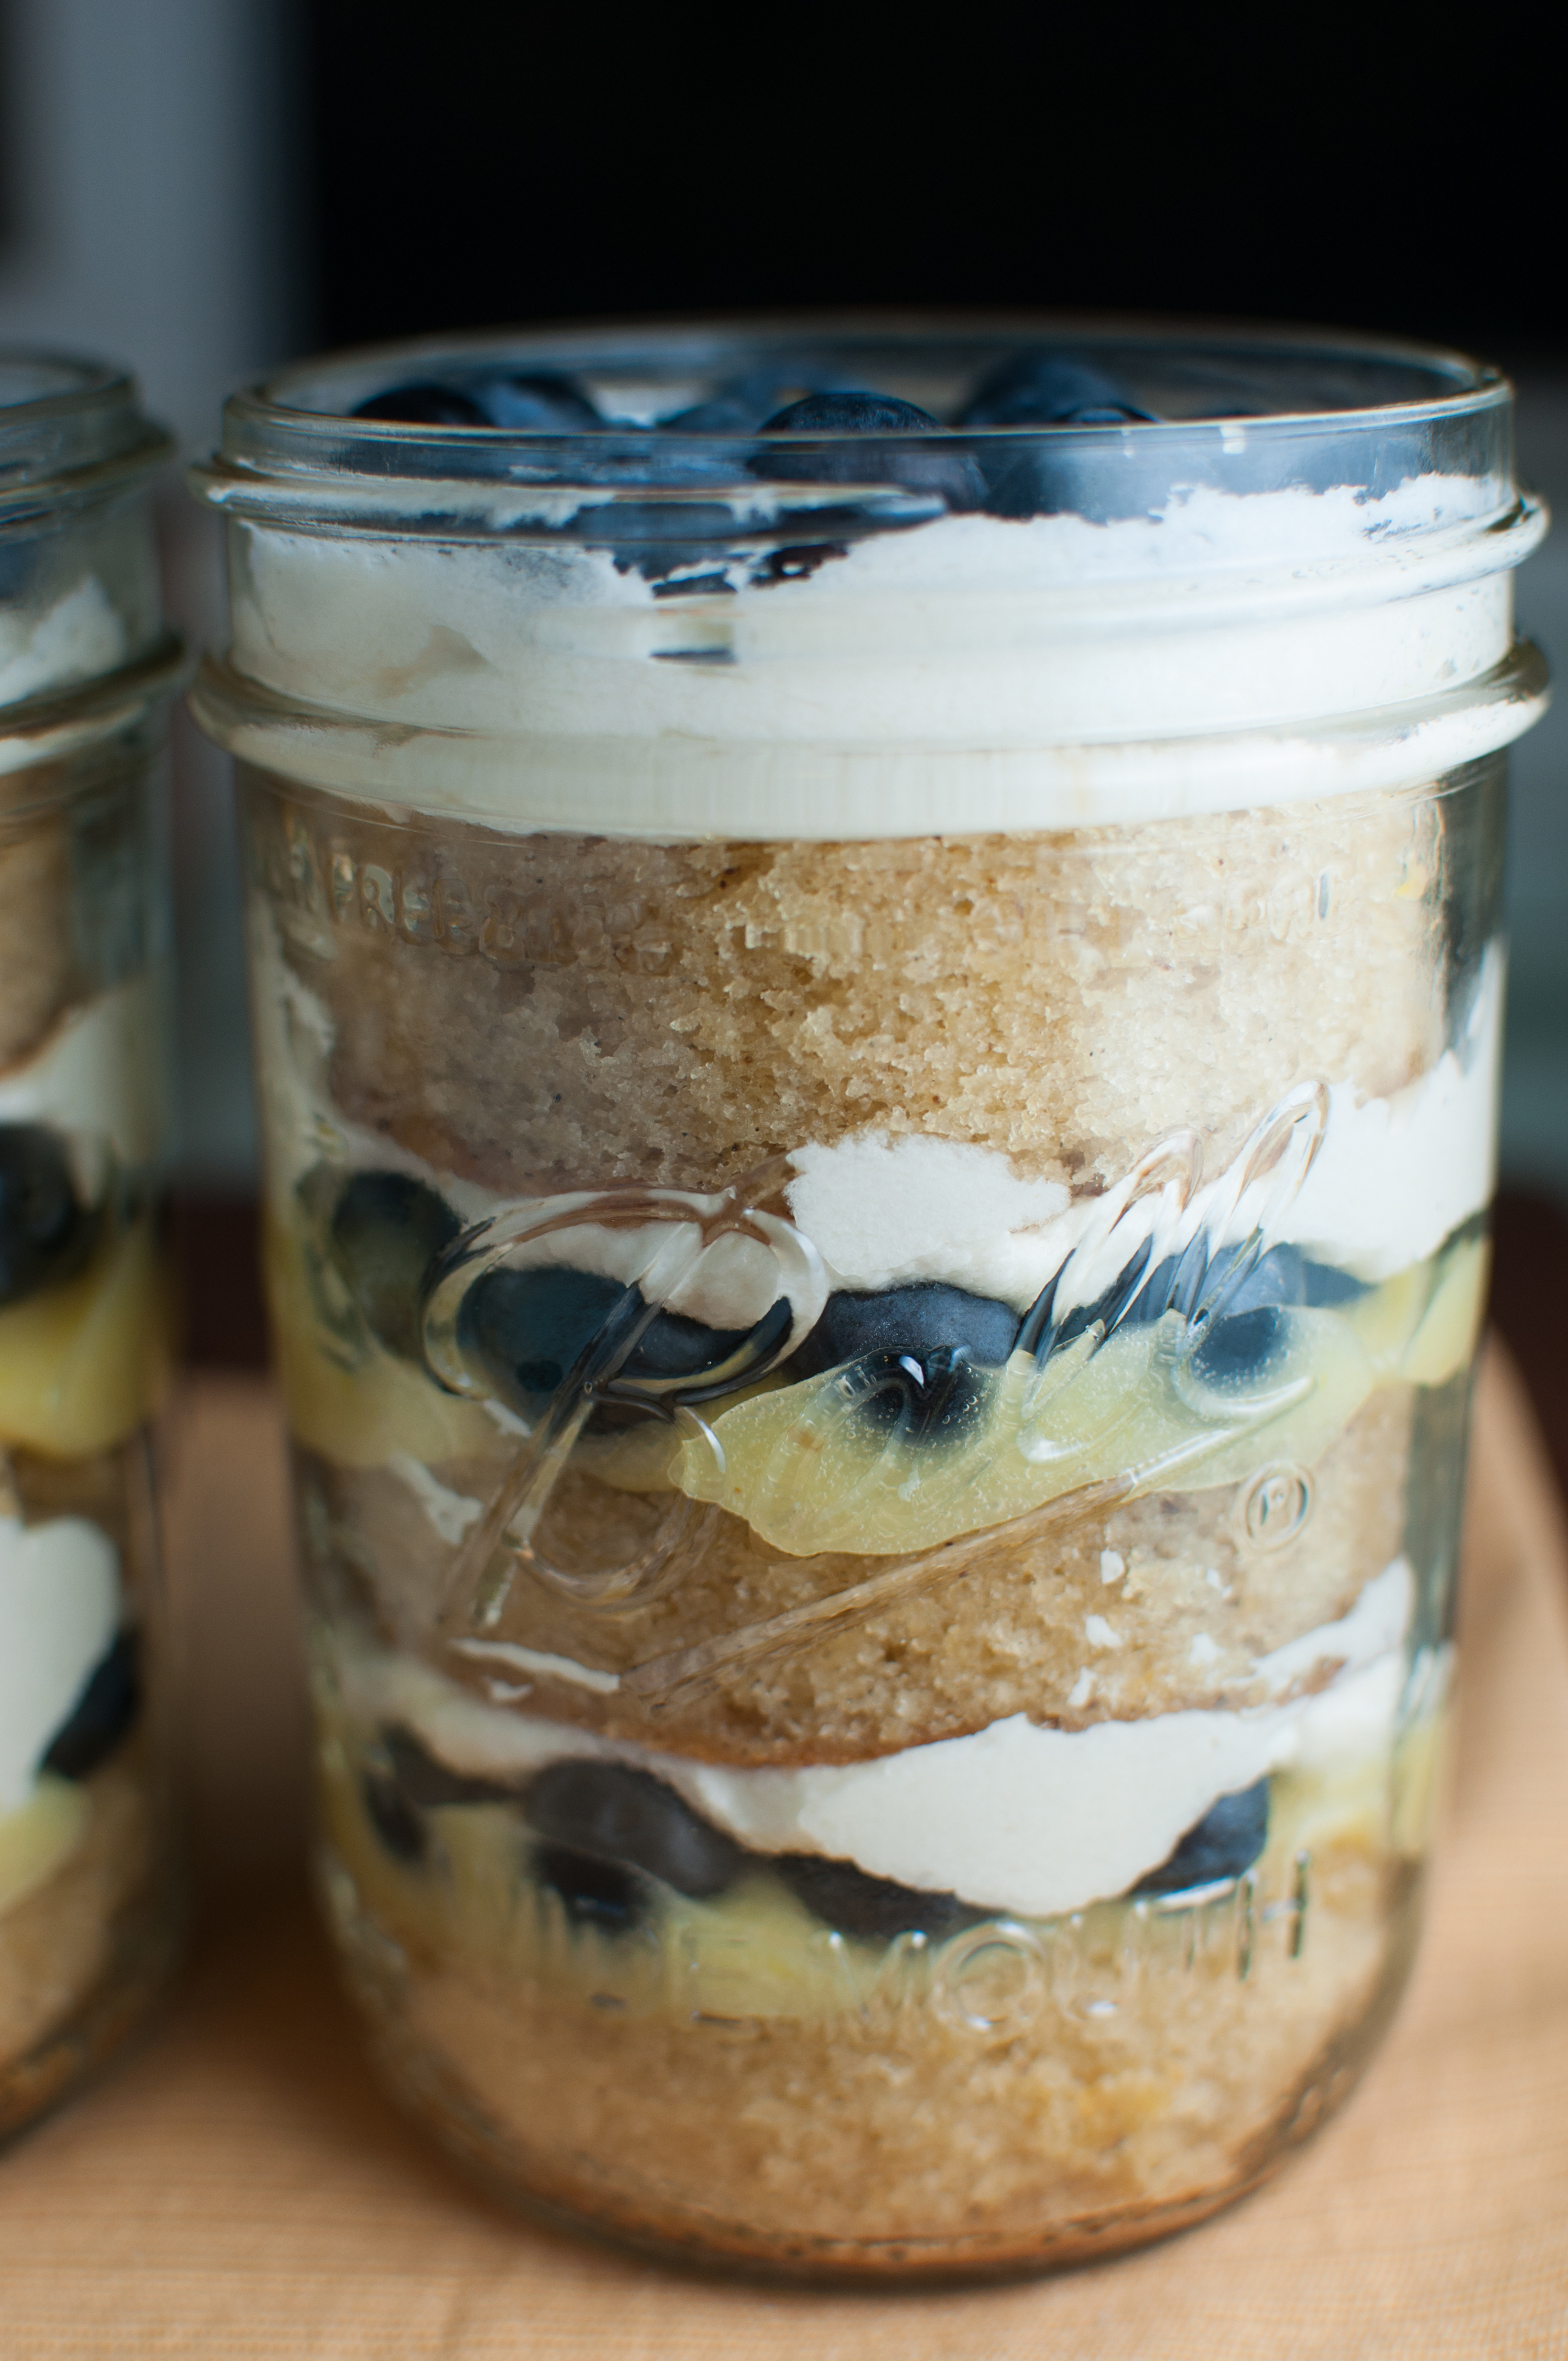
I decided to use some ball jars and layer up the cake and other goodies in them. They look beautiful, are super simple, and freeze really well! If you don't feel very comfortable decorating cakes, this is a great way to make something beautiful without much stress! 

So... here it is! 

Lemon Cake: 

Ingredients: 

1/2 cup unsalted butter, softened 

1 1/4 cup cane sugar 

1/4 cup brown sugar 

3 eggs 

1/2 cup milk

1/2 cup vegetable oil 

1 tsp ground vanilla (or 2 tsp vanilla extract) 

1 1/2 cups cake flour 

1 tsp baking powder 

1/2 tsp salt 

zest from two lemons 

Instructions: 

  • Preheat oven to 350. 
  • Cream together the butter and sugars in a stand mixer fitted with the paddle attachment (or a hand mixer or by hand if you don't have a stand mixer!). This will take about 3 minutes, as you want it to be nice and fluffy! 
  • Scrape down the sides of the bowl, add eggs, and mix again on medium high for another 2-3 minutes. 
  • With the mixer on low, slowly pour in the milk, oil, and vanilla. Then increase the mixer's speed to medium high and let it run for about five minutes, until the mixture has increased in size significantly and is nearing a pale white color. 
  • Add cake flour, baking powder, salt, and lemon zest and mix on a low speed just until the dry ingredients are fully incorporated. Scrape down the sides of the bowl to ensure there aren't any lumps of flour remaining. Mix a little longer if you find any flour clumps! 
  • Prepare a quarter sheet pan for the cake (you could also use a 9x13 pan, but I recommend a quarter sheet). You can spray the pan, and line it with parchment paper or just put a silpat in the bottom of the pan. 
  • Pour batter into the pan, and flatten with a spatula. Tap it on the counter a few times to help the batter settle, then pop it in the oven! 
  • Let bake for 30 minutes, turning the cake after 15 minutes to ensure even baking. Cake should bounce back if poked gently with your finger. Let it bake a bit longer if it doesn't bounce back, or is still jiggly in the center. 
  • Let cake cool completely on a wire rack, then invert onto a cutting board and pull the parchment or silpat off the bottom of the cake. 


Lemon Curd: 

Ingredients: 

1/2 cup plus 2 Tbsp fresh lemon juice 

3 large eggs 

1 large egg yolk 

3/4 cup suar 

pinch of salt 

6 Tbsp unsalted butter, cold 

Instructions: 

  • Create a double boiler by resting a rimmed glass or stainless steel bowl in a medium saucepan with a few inches of water in the bottom. The water should not touch the bottom of your bowl. 
  • While your water is heating over medium heat, whisk together lemon juice, eggs, egg yolk, sugar, and salt in the bowl. Continue whisking and cooking the mixture for about ten minutes, until it gets thick enough for your whisk to leave a trail and registers 180 on a quick-read thermometer (if you like to temp your food!). Be sure you're continuously whisking the entire time so as not to let the eggs cook too fast. 
  • Remove bowl from saucepan, and stir gently while the curd cools for a minute or two. 
  • Once it's cooled to about 140 degrees, add butter one tablespoon at a time, using an immersion blender to completely integrate the butter before adding the next piece. If you don't have an immersion blender, just give it a good whisk to integrate the butter. 


Lemon Frosting: 

Ingredients: 

1/2 cup unsalted butter, softened 

2 cups powdered sugar 

2 Tbsp heavy cream (or milk if you don't have cream!) 

2 Tbsp lemon juice 

1/2 tsp vanilla 

Instructions: 

  • In a mixer with a whisk attachment, or just using a whisk by hand, whisk the butter for about a minute to give it a bit of fluff (I had to start this by hand, as my mixer needs more than just half cup of a butter to function smoothly!). 
  • Add all remaining ingredients and whip for a few minutes, until fully combined and nice and fluffy. 
  • Easy! 

Assembling the Cakes! 

Mini Cakes:

Use a 3" biscuit cutter to cut as many rounds as you can from the sheet cake. 

You can make the cakes directly on whatever surface you'll use to serve them, or one big sheet. If you make them on a sheet pan, you can place a little parchment square under each one for easy serving. 

Now to layer! First, one cake layer, then a hearty spoonful of lemon curd. Place a spiral of blueberries onto the curd, and add your next layer of cake. Then, simply cover the little cake with frosting! Start by covering the top completely with a thin layer of frosting. Then add a thin layer of frosting around the sides to hold the crumbs (and curd!) place. Finally, fully frost the edges of your little cake. 

Decorate with blueberries, and enjoy! 

Ball Jar Cakes: 

Making cakes in ball jars is as easy as layering in the ingredients!

Cut your sheet cake into as many circles as you can using a biscuit cutter, or whatever other round cutter you might have. You'll want to make sure that the rounds will fit into the jars you're using. I used a 2 7/8" biscuit cutter and wide mouth pint jars for reference. You can use the scraps of cake to create layers as well, they just won't look quite as perfect. 

Place a cake layer in the bottom of your jar. Spread a little lemon curd on the layer. Sprinkle on a hearty layer of blueberries, and carefully dollop a big spoonful of frosting on top of the berries and push it to the edges in an even layer. Continue this process until you add the last cake layer that will fit. Spread frosting over the top layer of cake all the way to the edges of the jar, and decorate with some blueberries! 

These will freeze easily for later use! 


Comment